The mistakes that come back to bite
Most fixture installation problems we’re called to fix later trace back to one of three preventable mistakes at install: wrong rough-in measurement, mismatched drain or supply size, or undersealed connections. Checking these before the install starts saves you the cost of doing it twice.
For professional fixture installation we run through these checks as standard, but they’re useful to know whether you’re hiring us or attempting a DIY.
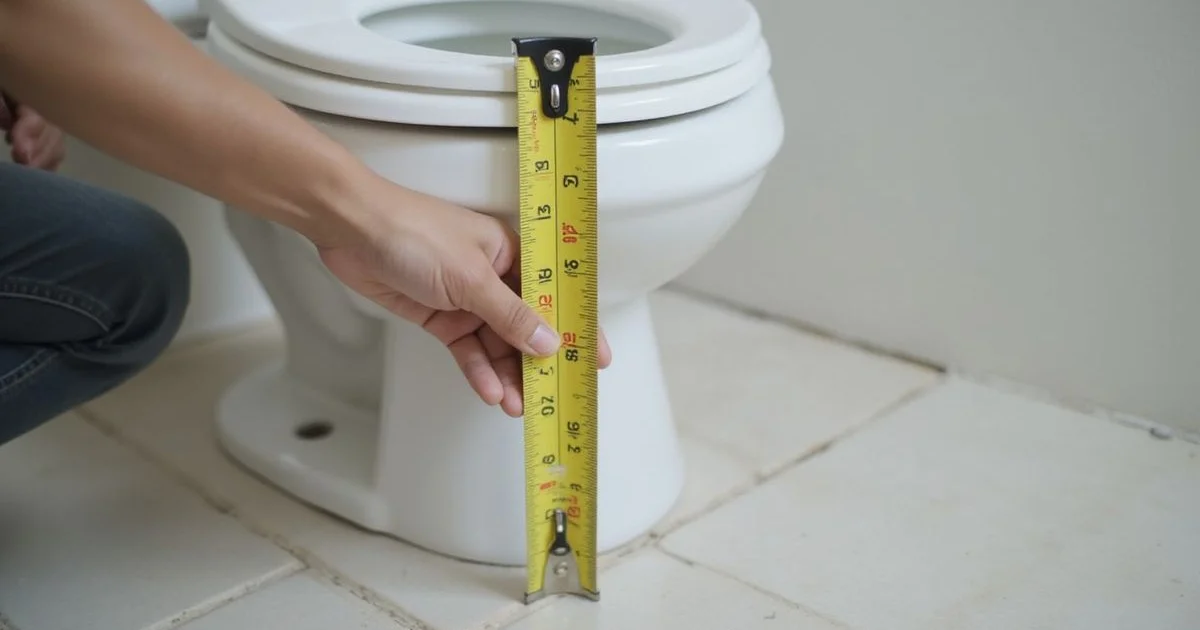
Check 1: Toilet rough-in distance
The rough-in is the distance from the finished wall behind the toilet to the centre of the drain on the floor. Standard residential rough-in is typically 30cm (12 inches), but many Malaysian homes — especially older ones — vary.
Before buying a new toilet, measure the rough-in on your existing bathroom and match the toilet’s specification to it. A toilet designed for 30cm rough-in installed onto a 25cm rough-in won’t seat against the wall properly. The reverse leaves an awkward gap.
If you don’t know how to measure, send us a photo and we’ll confirm the rough-in distance and what fits.
Check 2: Drain size and type
Toilets and sinks connect to drains of specific sizes — typically 100mm for toilet drains and 32-40mm for basin and sink traps. If you’re replacing a fixture, the new drain side usually matches the old. If you’re installing where there wasn’t a fixture before, the drain has to be sized to match what you’re installing.
For sinks, also check whether the trap type matches — bottle traps and P-traps connect differently, and some basins assume one or the other.
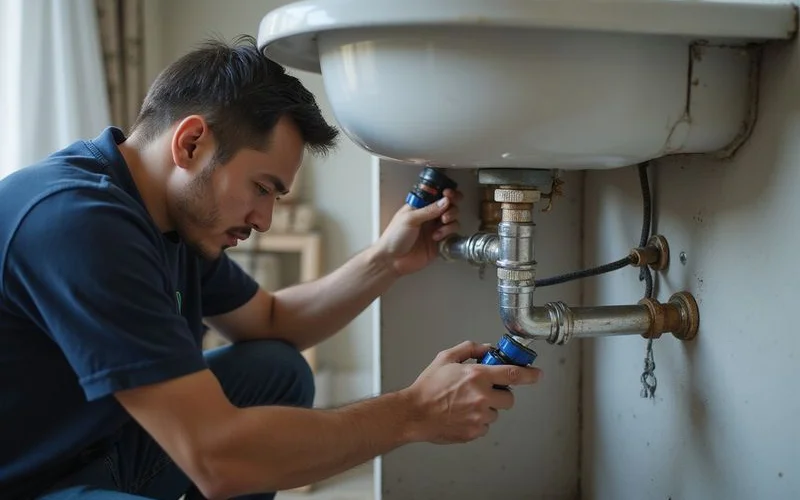
Check 3: Supply line size and shut-off valve
Toilets and basins have supply lines that connect to your home water supply. Most modern fixtures use a standard 1/2-inch supply connection, but check the new fixture’s specification.
Make sure there’s a working shut-off valve on the supply line near the fixture. Replacing a fixture with no shut-off means turning off the whole house supply for the install — possible but inconvenient. Installing a new shut-off as part of the work is straightforward and worth it.
Check 4: Seal types and replacement seals
Toilets seal to the drain with a wax ring (older standard) or rubber gasket (modern alternative). The seal is single-use — once you lift a toilet, the existing seal is no longer reliable and should be replaced.
Sink basins seal at the drain connection with a rubber washer and a thread connection. These can sometimes be reused if undamaged, but for a new install, fresh seals avoid future leak issues.
Check 5: Mounting and stability
Toilets bolt to the floor through holes in the base; basins mount to a wall bracket or vanity. Check that the existing mounting points line up with the new fixture’s mounting requirements — or that you can drill new holes if not.
Wobble during use puts strain on connections and eventually causes leaks. A toilet should sit completely solid on the floor with no rock. A basin should be securely held against its mount.
When DIY makes sense and when it doesn’t
A like-for-like replacement onto identical connections is reasonable DIY territory. Anything involving new connections, different rough-in, drain size changes, or the wall having to come off is where mistakes compound and professional install saves money over time.
The brand of fixture matters much less than the install quality. The best brand badly installed leaks. A modest brand installed properly works for years.